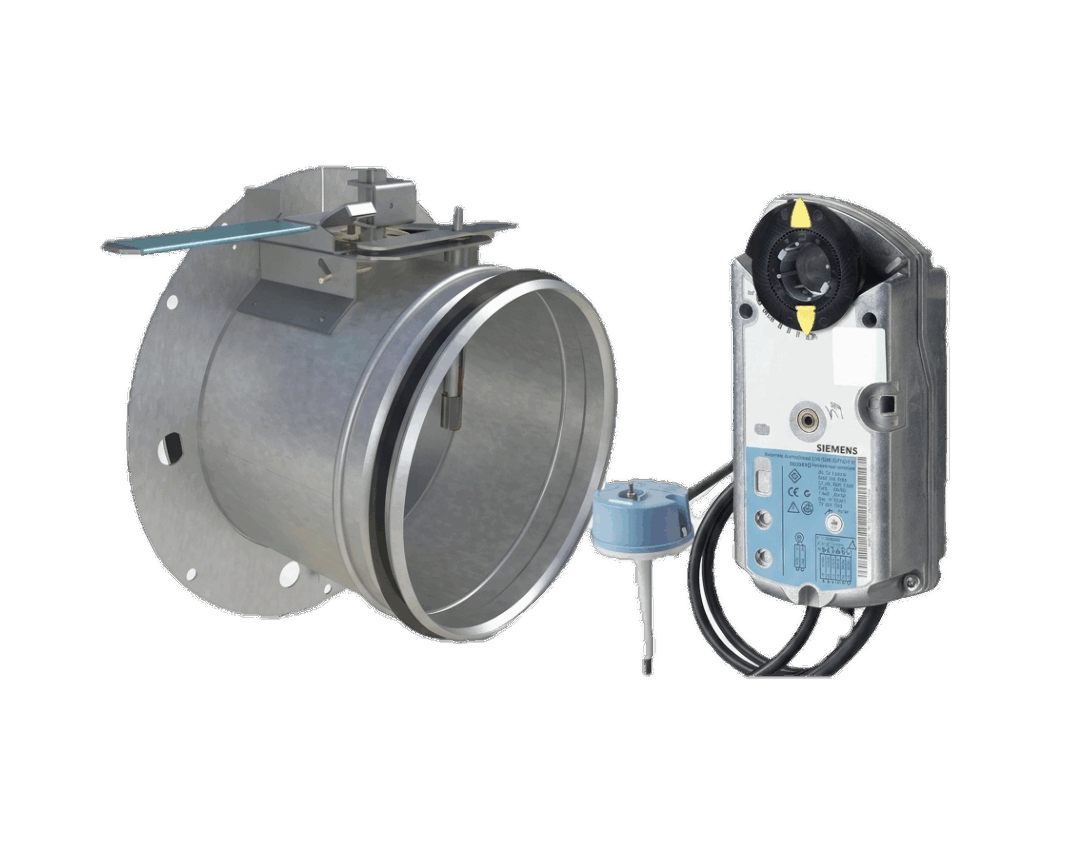
Right belt motor the selection is confirmed by checking four key matters: sufficient torque (Nm) small in relation to size, compatible steering method (On/Off, 3-point or modulating), right operating voltage (24V or 230V) and the need for the spring return function in safety-critical applications. Remembering these guarantees a successful and quick installation.
Dysfunctional ventilation, a stalled project and an unsatisfied customer – a familiar situation when a damper actuator fails unexpectedly. However, choosing a replacement actuator in a hurry can backfire if the new part is not compatible with the old one. The wrong control signal, too little torque or a missing safety function mean another trip to the wholesaler and more unnecessary working hours on site.
For a professional, time is money, and choosing the right part first time is the foundation of efficient work. This guide is a concise checklist drawn up for HVAC fitters and designers, going through the most critical points in selecting a damper actuator. With it, you can ensure that the next replacement job goes according to plan, without costly mistakes or unnecessary delays. When your need is to find a new damper actuator quickly, our online shop The comprehensive range provides solutions directly from stock. However, the first step is to understand how the device works and what its technical specifications mean in practice.
Why isn't the damper moving? Troubleshooting before getting a new motor
When the damper does not move, the first assumption is often a broken damper motor. However, before heading to the wholesaler, quick on-site troubleshooting can save both time and money. The fault is not necessarily in the motor itself, but the cause may be much simpler and quicker to fix.
1. Check the damper motor power supply and control signal
The most common reason for malfunction is often the most obvious one. Make sure that the motor is receiving the voltage and control it requires.
- Measure the voltage: Check with a multimeter that the correct operating voltage (e.g. 24 VAC/DC or 230 VAC) is reaching the motor terminals.
- Check the steering message: Ensure that the automation system sends a control signal to the motor (e.g. 0-10 VDC in modulating control or voltage on the control core in 3-point control).
- Check the fuses: Ensure that no fuse has blown in the switchboard or anywhere else in the system.
2. Check the mechanical operation of the damper
Even an efficient damper motor cannot move a jammed damper. In the worst-case scenario, a stiff damper can overload and break even a new motor.
- Release the engine: Switch the motor gearbox to neutral using the manual control button or lever. If there is no such function, detach the motor from the damper shaft.
- Try it by hand: Try turning the damper by hand from the axle. Does it move smoothly and through its entire range of motion?
- Check channel: Check the duct for potential obstructions, such as dirt, ice or foreign objects left over from construction work, which could jam the damper.
3. Inspect the sheet metal motor's shaft adapter and mounting
Sometimes the motor runs perfectly, but the movement is not transmitted all the way to the damper shaft. This is almost always due to an installation error or a loose fastening.
- Axis actuator Ensure that the adapter between the motor and the damper shaft is tightly secured. A loose adapter will allow the motor to spin freely.
- Swivel: Check that the anti-rotation device supplied with the motor is correctly and securely installed. If it is loose or broken, the entire motor will rotate with the damper shaft instead of turning the shaft.
If you have gone through these points and the fault still hasn't been found, it is likely that the damper actuator itself is faulty. In this case, it is time to move on to choosing a new, suitable motor to replace it.
Compatibility is key: How do you choose the right damper actuator?
Once the old motor has been found to be faulty, a successful replacement requires that the new motor is fully compatible with both the damper and the system controlling it. Gathering the correct information from the old unit before purchase is the surest way to avoid purchasing the wrong item. Go through these four points to ensure the installation is successful first time.
1. Torque (Nm) – Engine power
Torque is the single most important characteristic of a damper actuator. It indicates how much force the motor can produce to turn the damper. An actuator that is too weak will not be able to move the damper reliably, whereas an oversized actuator is unnecessarily expensive.
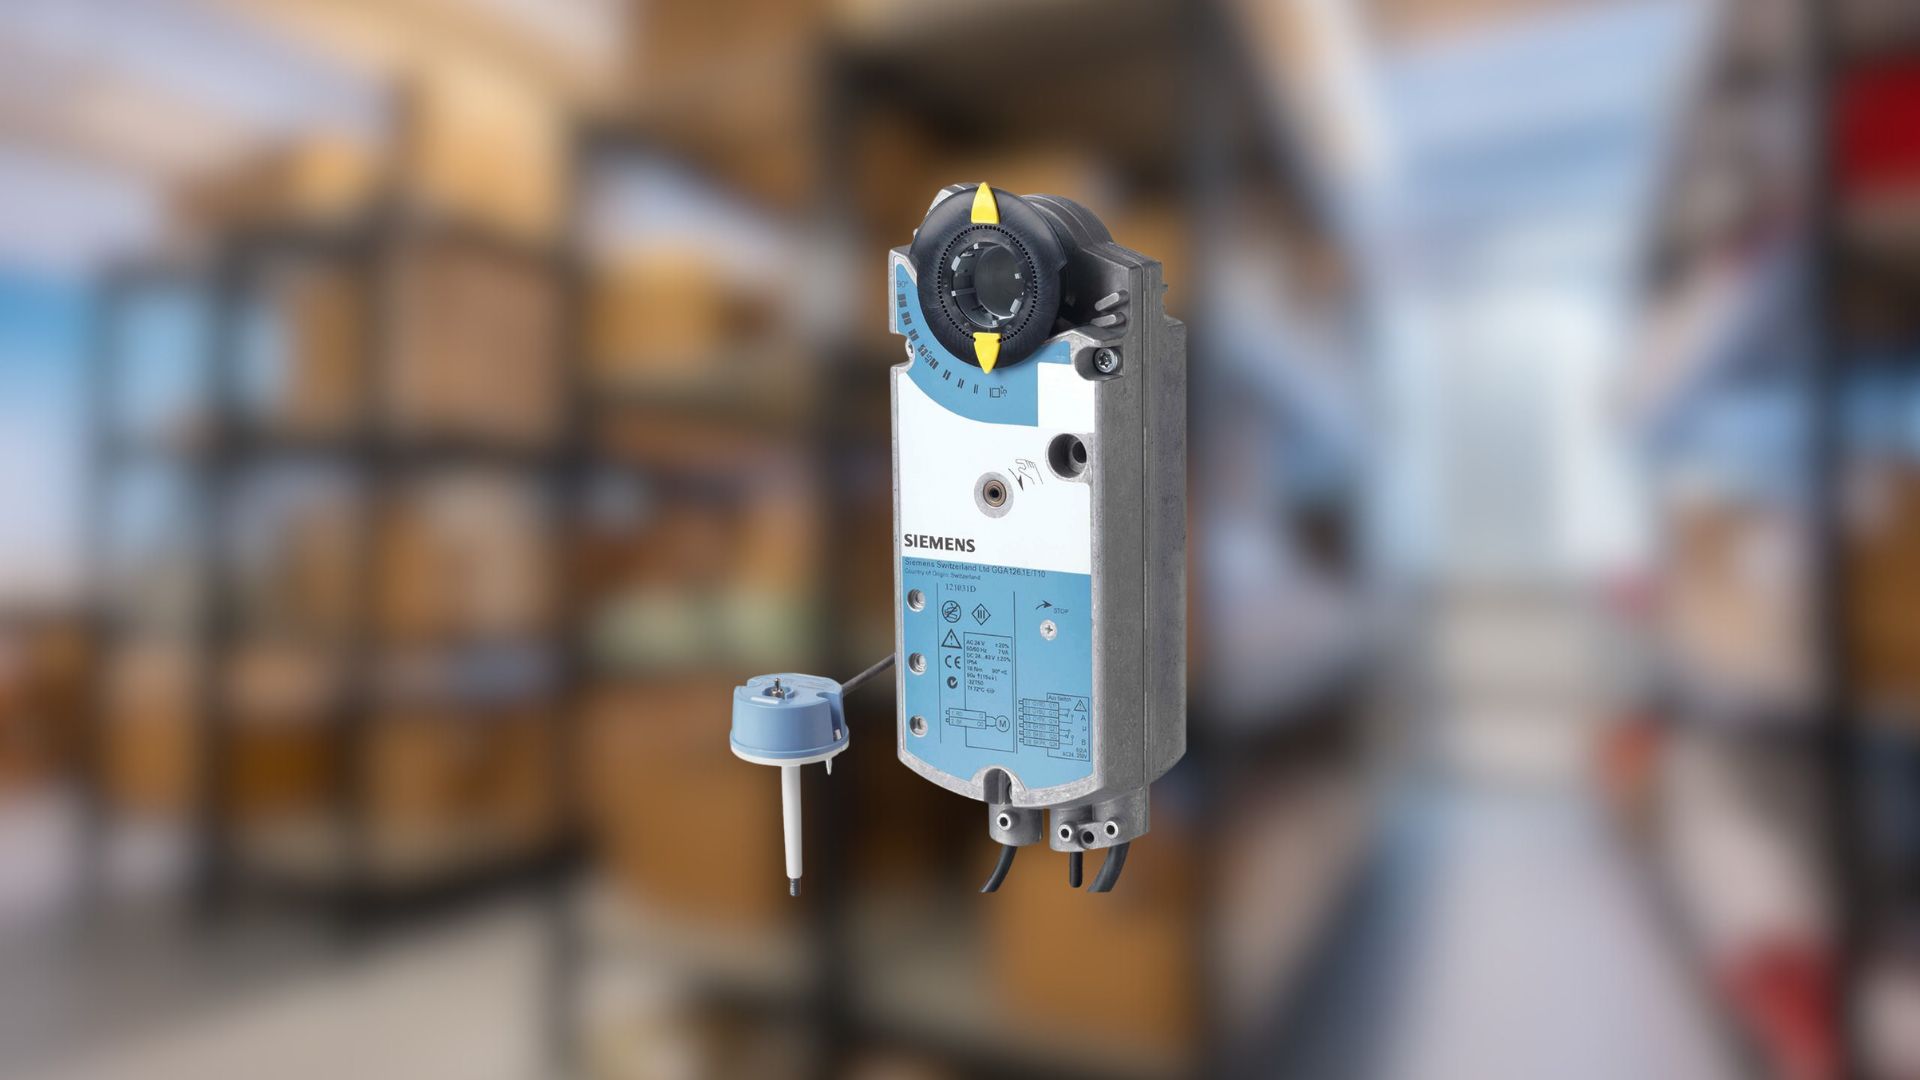
- Check from the old engine: The easiest way is to check the torque value directly from the old motor's rating plate. It is given in newton metres (Nm), for example 5 Nm, 10 Nm or 20 Nm.
- Evaluate based on the sheet size: If the rating plate is illegible, the sheet metal surface area can be used as a rule of thumb. A rough estimate is approximately 8–10 Nm per square metre (m²) I'm mowing the lawn. Always remember to choose a slightly more powerful engine if you're in doubt.
- Always choose one that is at least as effective: The torque of the new engine must be at least equal to or greater than the original.
2. Control method – How is the damper actuator commanded?
The damper actuator must understand the commands sent by the building automation system. An actuator with the wrong kind of control simply will not work in the system, even if it receives power.
- On/Off (2-position): The simplest control for driving a damper fully open or closed. Typically used in shut-off dampers.
- 3-point: The most common control method, which allows the damper to be opened, closed, and stopped in any position. You can often recognise it by its three control wires.
- Modulating (continuous, 0-10 VDC): A precise control method used when the air volume needs to be adjusted steplessly. Control is carried out via a voltage signal, typically 0–10 VDC. Essential in VAV systems, for example.
Check the old motor connections and rating plate to find out which control method the system uses.
3. Operating voltage – 24 V or 230 V?
This is a critical point where a mistake can break the new engine immediately. Always check what voltage is used at the target.
- 24 VAC/DC: Low voltage is the most common in modern automation systems due to its safety.
- 230 VAC: Mains voltage is often used in older systems or for simple on/off control without a separate automation system.
The information can be found most reliably on the old motor's rating plate. Never assume – measure the voltage from the supply cable if you are in doubt.
4. Spring return – Is a safety function required?
Spring return (fail-safe) is a safety function that drives the damper to a predetermined position (usually closed) in the event of a power failure. This is vital in certain applications.
- When is it needed? Spring return is essential, for example, in outdoor dampers to prevent heating radiators from freezing (frost protection) and in fire and smoke control dampers.
- How do you recognise it? A spring-return motor is often physically larger than a corresponding one without a spring. If the old motor had this feature, the new one must have it too. That is non-negotiable.
Once these four things are clear, you are ready to get a new one belt motor. Next, we will go through the most common installation errors and how to avoid them.
Electric motor and property energy efficiency – Why does the choice matter?
Although a damper actuator is often seen as merely a mechanical component, it plays a significant role in the energy efficiency of the entire property. Modern ventilation is not just about on/off switching, but precise control where air volumes are optimised according to need. In this equation, a high-quality damper actuator acts as a decisive factor: it translates the commands given by the automation system into physical movement. If the actuator is imprecise or slow in operation, the ventilation unit may run at an unnecessarily high power or the supply air temperature may fluctuate, which increases the consumption of heating energy.
In particular, a modulating damper actuator plays a key role in VAV (Variable Air Volume) systems, where the air volume is adjusted steplessly based on, for example, the indoor carbon dioxide concentration. When the damper actuator is able to set the damper precisely to the exact right angle, the ventilation serves the occupants of the space optimally without wasting energy. Old or incorrectly sized actuators may “hunt” back and forth while searching for the correct position, which unnecessarily wears out both the device itself and energy.
Another factor affecting energy efficiency is the tightness of the damper in the idle state. When the ventilation unit stops for the night or the weekend, the outdoor air damper must close completely tightly. Here, the damper actuator and its torque are crucial. If the actuator lacks the force to press the damper against the seals with sufficient strength, cold outdoor air can flow into the unit or ductwork. This causes a risk of freezing for the heating coil and forces the system to use extra energy for heating during morning startup. A correctly chosen damper actuator ensures that the shut-off damper is, as the name implies, tight.
Investing in a high-quality actuator pays for itself not only in reliability, but also in lower lifecycle costs. When choosing a new device, it is therefore worth looking beyond the purchase price to consider its technical features. A good damper actuator is a long-lasting partner that looks after the property's conditions discreetly yet efficiently year after year.
DIY replacement or professional help? What needs to be considered during installation?
For an HVAC professional, replacing a damper actuator is often a routine procedure. However, routines also harbour risks if steps are skipped or small but important details are ignored. A carefully executed installation and commissioning ensure that the system operates reliably and you avoid unnecessary call-backs to the site.
The A and Z of installation: Mechanical fixing
Before touching any electrical wires, a flawless mechanical foundation must be ensured. This is the most crucial step for the lifespan of the new motor.
- Test the movement of the plate by hand: Before installing the new motor, ensure that the damper moves easily and without resistance in the duct over its entire range of motion. A sticking damper will quickly ruin even a new motor.
- Tighten the shaft adapter properly: Ensure that the shaft adapter supplied with the motor is the correct size for the damper shaft and that it is tightened securely. A loose adapter is one of the most common reasons why the “motor turns, but the damper does not move”.
- Don't forget the anti-rotation device: This small, but vital part prevents the entire motor body from rotating with the damper shaft. Ensure that it is securely installed against the duct surface or a fixed structure in accordance with the manufacturer's instructions.
Electrical work: Carefulness is rewarded
In electrical connections, accuracy and safety are paramount. Assumptions can lead to equipment failure or malfunctions.
- Power off: Always isolate the working area before disconnecting the old motor and connecting a new one. This is a fundamental rule of occupational safety.
- Read the new motor's wiring diagram: Do not assume that the wire colours or connector order are the same as in the old motor – not even in different models from the same manufacturer. Always check the correct wiring from the manual provided with the new device.
- Check the control cables carefully: Especially in 3-point control, the incorrect order of conductors can cause the motor to operate in the reverse of the intended direction. Ensure that the control signals (open/close) are connected to the correct terminals.
Commissioning: The final polish ensures operation
Työ on valmis vasta, kun toiminta on testattu. Muutaman minuutin tarkistus säästää potentiaaliselta murheelta ja ylimääräiseltä ajomatkalta.
- Tarkista pyörimissuunta: Aja moottoria hetki ja varmista, että se pyörii haluttuun suuntaan avatessaan peltiä. Tarvittaessa vaihda pyörimissuunta moottorissa olevasta kytkimestä.
- Aja ääriasennot läpi: Anna moottorin ajaa pelti täysin auki ja täysin kiinni. Varmista, että liike on sulavaa ja pelti saavuttaa ääriasentonsa ilman ongelmia.
- Testaa jousipalautus: Jos moottorissa on jousipalautus, testaa sen toiminta katkaisemalla moottorilta käyttöjännite. Pellin tulee palautua turva-asentoon jousivoimalla.
- Varmista asentotieto (jos käytössä): Mikäli moottorissa on apukytkimiä, tarkista rakennusautomaatiojärjestelmästä, että tieto pellin asennosta (esim. “täysin auki”) välittyy oikein.
Huolellisesti tehty asennus takaa paitsi laitteen toimivuuden, myös asiakkaan tyytyväisyyden. Kun oikea tuote on valittu ja asennettu ammattitaidolla, järjestelmä toimii luotettavasti vuosien ajan.
Työ valmis? Ei vielä! Testaus ja käyttöönotto varmistavat onnistumisen
Uusi peltimoottori on paikallaan ja johdot kytketty. Vaikka työ näyttää valmiilta, tärkein vaihe on vielä edessä: toiminnan todentaminen. Huolellinen testaus ja käyttöönotto ovat ammattilaisen viimeinen varmistus siitä, että järjestelmä toimii täsmälleen suunnitellusti ja asiakkaalle luovutetaan moitteeton kokonaisuus. Muutaman minuutin lopputarkastus säästää potentiaaliselta takuukeikalta.
1. Varmista oikea pyörimissuunta
Anna automaatiojärjestelmälle avauskäsky ja seuraa, pyöriikö moottori suuntaan, joka avaa pellin. Tämä on yleinen virhe, joka on helppo korjata heti alussa. Useimmissa laadukkaissa moottoreissa on pyörimissuunnan vaihtokytkin, jolla suunnan voi korjata helposti ilman johtojen uudelleenkytkentää.
2. Aja liikerata päästä päähän
Ohjaa moottori manuaalisesti tai automaation kautta sekä täysin auki- että kiinni-asentoon. Varmista, että pelti liikkuu koko matkan ja sulkeutuu tiiviisti. Jos moottorissa on säädettävät mekaaniset rajoittimet, aseta ne tässä vaiheessa vastaamaan pellin todellista liikerataa. Tämä estää moottoria yrittämästä vääntää peltiä sen mekaanisten rajojen yli.
3. Testaa jousipalautus (jos mallissa on)
Jos asensit jousipalautuksella varustetun moottorin, sen turvatoiminto on ehdottomasti testattava. Katkaise moottorilta käyttöjännite. Toimivan jousipalautuksen tulee ajaa pelti välittömästi ennalta määriteltyyn turva-asentoon (yleensä kiinni). Kytke jännite takaisin ja varmista, että moottori palaa automaation ohjaukseen.
4. Vahvista asentotiedon ja ohjauksen toiminta
Varmista, että moottori reagoi oikein ohjausviestiin. Jos kyseessä on moduloiva moottori, testaa muutama väliarvo (esim. 5V ohjaus = 50% auki). Mikäli moottori on varustettu apukytkimillä tai asentoviestillä, tarkista rakennusautomaatiojärjestelmän näytöltä, että tieto vastaa pellin todellista asentoa. Tämä on kriittistä järjestelmän logiikan ja valvonnan kannalta.
Kun nämä vaiheet on suoritettu, voit luottaa siihen, että työ on tehty ammattimaisesti loppuun asti. Toimiva ja oikein käyttöönotettu outboard motor on ilmanvaihtojärjestelmän luotettava peruspilari.
Do you need help with installation or maintenance?
Helvis Express focuses on the expert sales of high-quality HVAC products and rapid deliveries. When your project also requires contracting, installation or maintenance services, our partner Helsingin LVIS Säätölaitepalvelu Oy happy to help. Proceed to read more and contact their experts.
Leave a Comment
Your email address will not be published. Required fields are marked *
You must be logged in to post a comment.